Welcome to another Salesforce automation tutorial.
As usual, I will explain the challenge and ‘criticise’ Salesforce for not having a built-in solution. Of cause, in the end, a useful custom solution for this problem will be provided.
Let’s get started.
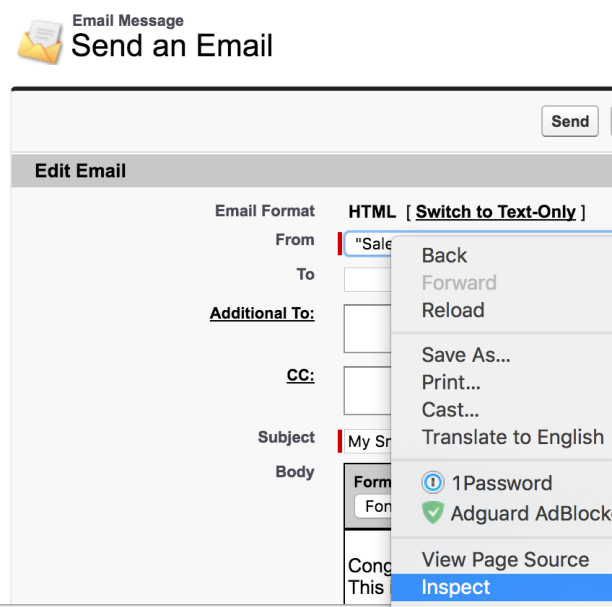
Challenge: Salesforce comes with a pretty cool approval tool – approval process, it handles most of the business needs, however, I feel like its missing one of the most important features – attaching files with the approval email.
Since there is no way to hack the standard feature, I decided to explore “Salesforce Files” instead of “Salesforce Attachments”. (Yes, they are different)
What I have noticed is that Salesforce files can be shared externally via public facing links, maybe we can include this in the approval email to allow approvers to view/download files similar to how people download email attachments.
To achieve this, we are going to need:
- A custom field to hold the links
- An HTML email template to include the custom field
- An apex trigger to:
- create an external link for each attachment
- update the custom field with the new links
- remove links when files are deleted
A custom field is really easy, just create a custom field under the object with type = rich text area.

Next step, we create an email template that includes this new field. (Too easy, not going to include any screenshots…)
Now the fun part, apex trigger.
After going through the documentation, I realised it’s not as simple as I imagined. This apex trigger not only takes care of generating and removing public links but also writes the links back to our custom field in HTML format.
List<ID> ContentDocumentIDs = new List<ID>();
List<ID> yourObjectIDs = new List<ID>();

/* ====== creating public facing urls for files after link insert ====== */
if (Trigger.isInsert){
  String tmp;
  // adding qualified files to the list - YourObject
  for (ContentDocumentLink cdl : Trigger.New){
    tmp = cdl.LinkedEntityId;
    // need to use Left to build links only for related objects (e.g. opportunity)
    if (tmp != null && tmp.left(3) == 'xxx'){
      ContentDocumentIDs.add(cdl.ContentDocumentId);
      yourObjectIDs.add(tmp);
    }
  }
  // list of content documents
  List<ContentDocument> cdList = [
    select id, Title, LatestPublishedVersionId
    from ContentDocument
    where id in: ContentDocumentIDs
  ];

  // list of public links
  List<ContentDistribution> cds = new List<ContentDistribution>();
  for (ContentDocument c : cdList){
    ContentDistribution cd = new ContentDistribution(
        name = c.Title + ' - ' + date.today().format(),
        ContentVersionId = c.LatestPublishedVersionId
    );
    cdList.add(cd);
  }
  // creating links
  insert cdList;
}
else if (Trigger.isDelete){
  System.debug('YourObject Content Sharing Trigger Starts');
  String tmp;
  // adding qualified files to the list - YourObject
  for (ContentDocumentLink cdl : Trigger.Old){
    tmp = cdl.LinkedEntityId;
    if (tmp != null && tmp.left(3) == 'a1V'){
        ContentDocumentIDs.add(cdl.ContentDocumentId);
        yourObjectIDs.add(tmp);
    }
  }
  delete [
    select id, Title, LatestPublishedVersionId
    from ContentDocument
    where id in: ContentDocumentIDs
  ];
}

/* ====== Now writing links back to Your Objects ====== */

if (!yourObjectIDs.isEmpty()){
  System.debug('Writting back to Your Objects');
  // reset attachment list in Your Objects
  List<ContentDocumentLink> ContentDocumentLinks = [
    select id, LinkedEntityId, ContentDocumentId
    from ContentDocumentLink
    where LinkedEntityId in :yourObjectIDs
  ];
  System.debug('ContentDocumentLinks: ' + ContentDocumentLinks);
  // Your Object ID -> ContentDocument IDs
  Map<ID, List<ID>> ContentDocumentMap = new Map<ID, List<ID>>();
  List<ID> ContentDocumentIds = new List<ID>();
  for (ContentDocumentLink ContentDocumentLink : ContentDocumentLinks){
    ContentDocumentIds.add(ContentDocumentLink.ContentDocumentId);
    if (ContentDocumentMap.containsKey(ContentDocumentLink.LinkedEntityId)){
      ContentDocumentMap.get(ContentDocumentLink.LinkedEntityId).add(ContentDocumentLink.ContentDocumentId);
    }
    else{
        ContentDocumentMap.put(ContentDocumentLink.LinkedEntityId, new List<ID>{ContentDocumentLink.ContentDocumentId});
    }
}

List<ContentDocument> ContentDocuments = [
  select id, Title, LatestPublishedVersionId
  from ContentDocument
  where id in: ContentDocumentIds
];
System.debug('ContentDocuments: ' + ContentDocuments);
List<ID> LatestPublishedVersionIds = new List<ID>();
for (ContentDocument ContentDocument : ContentDocuments){
    LatestPublishedVersionIds.add(ContentDocument.LatestPublishedVersionId);
}

List<ContentDistribution> ContentDistributions = [
  select id, Name, DistributionPublicUrl, ContentDocumentId, ContentVersionId
  from ContentDistribution
  where ContentVersionId in: LatestPublishedVersionIds
];
System.debug('ContentDistributions: ' + ContentDistributions);
// ContentDocumentId -> ContentDistribution
Map<ID, ContentDistribution> ContentDistributionMap = new Map<ID, ContentDistribution>();
for (ContentDistribution ContentDistribution : ContentDistributions){
    ID tmpDocId = ContentDistribution.ContentDocumentId != null ? ContentDistribution.ContentDocumentId : ContentDistribution.ContentVersionId;
    ContentDistributionMap.put(tmpDocId, ContentDistribution);
}
// Your Object ID -> List<ContentDistribution>
Map<ID, List<ContentDistribution>> pMap = new Map<ID, List<ContentDistribution>>();
List<Purchase_Order__c> Your Objects = [
  select id, Attachment_List__c
  from purchase_order__c
  where id in: yourObjectIDs
];
System.debug('Your Objects: ' + Your Objects);
String attachmentString = '';
For (Purchase_Order__c YourObject : Your Objects){
    if (ContentDocumentMap != null && ContentDocumentMap.size() > 0){
        for (ID ContentDocumentId : ContentDocumentMap.get(YourObject.id)){
            attachmentString += '
	<li><a href="' + ContentDistributionMap.get(ContentDocumentId).DistributionPublicUrl + '">' + ContentDistributionMap.get(ContentDocumentId).Name + '</a></li>
';
        }
    }
    YourObject.Attachment_List__c = attachmentString;
}

update Your Objects;

 /* ====== Now writing links back to Your Objects ====== */

if (!yourObjectIDs.isEmpty()){
  System.debug('Writting back to Your Objects');
  // reset attachment list in Your Objects
  List<ContentDocumentLink> ContentDocumentLinks = [
    select id, LinkedEntityId, ContentDocumentId
    from ContentDocumentLink
    where LinkedEntityId in :yourObjectIDs
  ];
  System.debug('ContentDocumentLinks: ' + ContentDocumentLinks);
  // Your Object ID -> ContentDocument IDs
  Map<ID, List<ID>> ContentDocumentMap = new Map<ID, List<ID>>();
  List<ID> ContentDocumentIds = new List<ID>();
  for (ContentDocumentLink ContentDocumentLink : ContentDocumentLinks){
    ContentDocumentIds.add(ContentDocumentLink.ContentDocumentId);
      if (ContentDocumentMap.containsKey(ContentDocumentLink.LinkedEntityId)){
        ContentDocumentMap.get(ContentDocumentLink.LinkedEntityId).add(ContentDocumentLink.ContentDocumentId);
      }
      else{
        ContentDocumentMap.put(ContentDocumentLink.LinkedEntityId, new List<ID>{ContentDocumentLink.ContentDocumentId});
      }
  }

  List<ContentDocument> ContentDocuments = [
    select id, Title, LatestPublishedVersionId
    from ContentDocument
    where id in: ContentDocumentIds
  ];
  System.debug('ContentDocuments: ' + ContentDocuments);
  List<ID> LatestPublishedVersionIds = new List<ID>();
  for (ContentDocument ContentDocument : ContentDocuments){
    LatestPublishedVersionIds.add(ContentDocument.LatestPublishedVersionId);
  }

  List<ContentDistribution> ContentDistributions = [
    select id, Name, DistributionPublicUrl, ContentDocumentId, ContentVersionId
      from ContentDistribution
      where ContentVersionId in: LatestPublishedVersionIds
  ];
  System.debug('ContentDistributions: ' + ContentDistributions);
  // ContentDocumentId -> ContentDistribution
  Map<ID, ContentDistribution> ContentDistributionMap = new Map<ID, ContentDistribution>();
  for (ContentDistribution ContentDistribution : ContentDistributions){
    ID tmpDocId = ContentDistribution.ContentDocumentId != null ? ContentDistribution.ContentDocumentId : ContentDistribution.ContentVersionId;
    ContentDistributionMap.put(tmpDocId, ContentDistribution);
  }
  // Your Object ID -> List<ContentDistribution>
  Map<ID, List<ContentDistribution>> pMap = new Map<ID, List<ContentDistribution>>();
  List<Purchase_Order__c> Your Objects = [
    select id, Attachment_List__c
    from purchase_order__c
    where id in: yourObjectIDs
  ];
  System.debug('Your Objects: ' + Your Objects);
  String attachmentString = '';
  For (Purchase_Order__c YourObject : Your Objects){
    if (ContentDocumentMap != null && ContentDocumentMap.size() > 0){
      for (ID ContentDocumentId : ContentDocumentMap.get(YourObject.id)){
        attachmentString += '
	<li><a href="' + ContentDistributionMap.get(ContentDocumentId).DistributionPublicUrl + '">' + ContentDistributionMap.get(ContentDocumentId).Name + '</a></li>
';
      }
    }
  YourObject.Attachment_List__c = attachmentString;
}

update Your Objects;
There you have it, a long, complicated, hard-to-read apex code. The first bit creates and deletes public links. The second long part adds the newly created links to our custom field created above – Attachment_List__c.
Finally, we add the File related list to the page layout. (Remove Attachments if you wish)
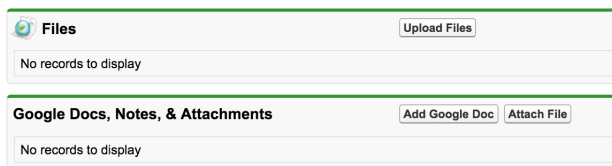
Here is what it looks like when a file is uploaded.
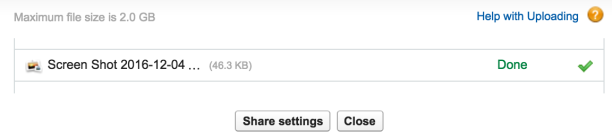
(File uploading page)

The Attachment List custom field looks like an unordered list, which is exactly what it looks like in the approval email. Approvers will now be able to click on the link and access the file without logging into Salesforce, how convenient is that.
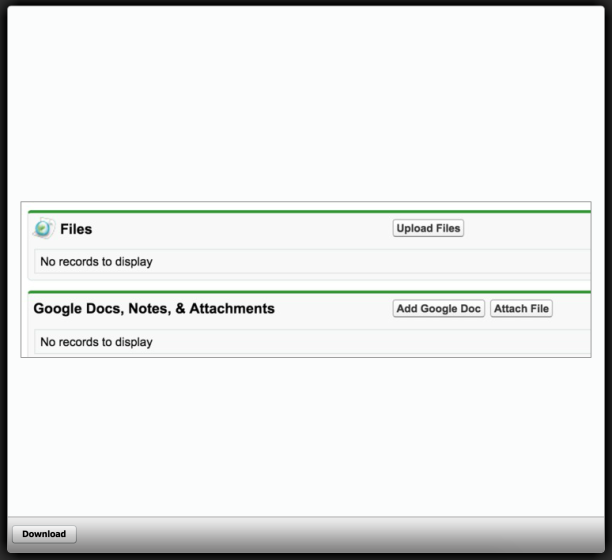
The external link also provides a useful download button if the file cannot be rendered by your browser.
That’s all for today, hope you enjoy it.